Intro
This tool and guide should help you make your own mods based on Project Zomboid Anthro Survivors (the “Furry Mod”) for build 41 and build 42.
Tool
Hi, Jackal here! I’m the programmer behind the mod and have created a tool to take most of the tedious work out of creating most types of mod. This is the first desktop application I’ve made since I was 15, so I apologize for the UI.
The tool can be downloaded here:
- pza-win64.zip (this is what you want if you use Windows)
- pza.zip (this is for any other operating system such as Linux or Mac)
The Windows build distributes with Qt 6.4.2 and PySide 6.4.2. These libraries are under the LGPL3 open source license, and so for legal reasons I must provide the entire source code used to build them. If you don't understand what these downloads are for, you can safely ignore them:
- qtbase-everywhere-src-6.4.2.tar.xz (QT 6.4.2 source code)
- pyside-setup-opensource-src-6.4.2.tar.xz (PySide 6.4.2 source code)
The program has been tested on Windows 10 by the Wolf, as I don’t run Windows much. To run the tool on Windows:
- Download it.
- Extract it.
- Double pza.exe.
- Select ‘More Info’ and choose to run the program anyway.
To run the tool on Linux or Mac, make sure Python 3.10 and Pip are installed, then at a shell use:
- pip3 install PySide6
- python3 app.py
Wolf, the artist, will now explain how to do the art side of things. Have fun!
Creating a custom character
To make your new species/character you will need to create a few assets:
- A 256x256 PNG image for the texture
- An FBX of the model to wear the texture
You can use any of the pre-existing models and textures as is-if you do not want or feel the need to change the shape of the character, as long as you follow some basic rules:
- You do not claim credit for the creation of the model or texture
- You do not repackage or resell the model or texture without written permission, unless you do so as part of a Project Zomboid mod
- You do not create modifications for the model or texture that promote hatred or harassment of any kind
Creating a character texture
256x256 pixels is the maximum size that Project Zomboid can handle, and is the size I used to create all the base species in Anthro Survivors.
- textures.zip (the textures for the base models)
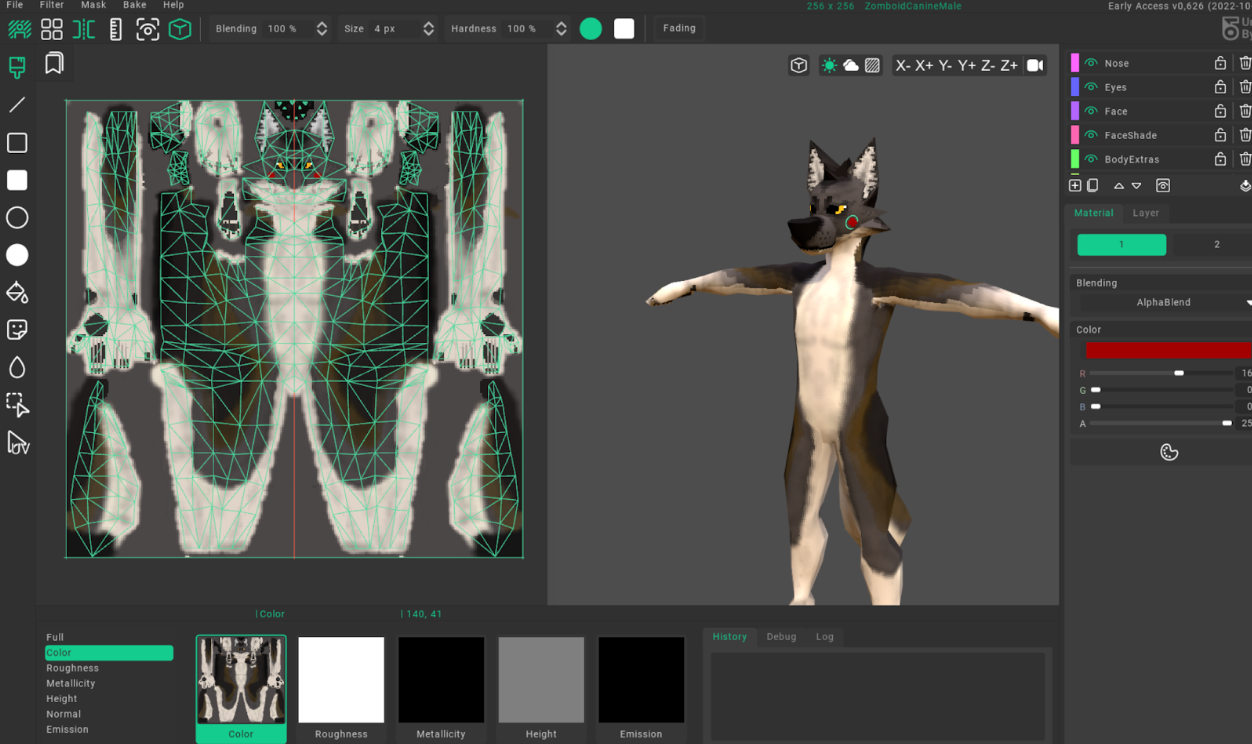
Any image editing software can be used to edit any of the existing files, such as changing color/tone or adding decals/designs. Editing the flat image can be tricky so using a 3D paint program can make it much easier to paint complex patterns because you can see the full model while painting.
For all the base Anthro Survivors textures I used a program called Union Bytes Painter, which is a pixel-art style 3D painter. While I use Substance Painter for my other work it was not handling lower resolution pixel art well.
Union Bytes Painter is US$13 on itch.io with a free demo:
- https://unionbytes.itch.io/union-bytes-painter (Union Bytes Painter homepage)
Below are the Union Bytes Painter project files for all the base species. If you want to work directly from them, they are set up with multiple layers, and this means that changing color/design is much easier than with Photoshop or another image editor.
- union-bytes-painter-project-files.zip (the Union Bytes Painter project files for base species)
If you create a new model for your character/species you will need to import it to paint on. Leading into…
Creating/editing a character model
If you want even more customization over a character’s shape you will need a 3D modeling program and to take a number of technical steps to get the model displaying and animating properly in Project Zomboid.
- models.zip (the base models)
Most any 3D editing program can be used. Blender is the most commonly used and a free solution. I use Autodesk Maya but the principles I will lay out are probably the same for any modern 3D editor.
The character’s head, tail or any other parts of the mesh, weights and UV layout is much more flexible, though the more the character’s head differs from the base human the less well hats and eyewear will fit.
I tried to keep the character’s eyes close to the base human model’s eyes so that glasses worked, and kept the top of the head in vaguely the same position.
Here are the base Project Zomboid male and female models you can use as reference to work from if you want:
- https://steamcommunity.com/sharedfiles/filedetails/?id=2648115890 (link to a tutorial containing the base models)
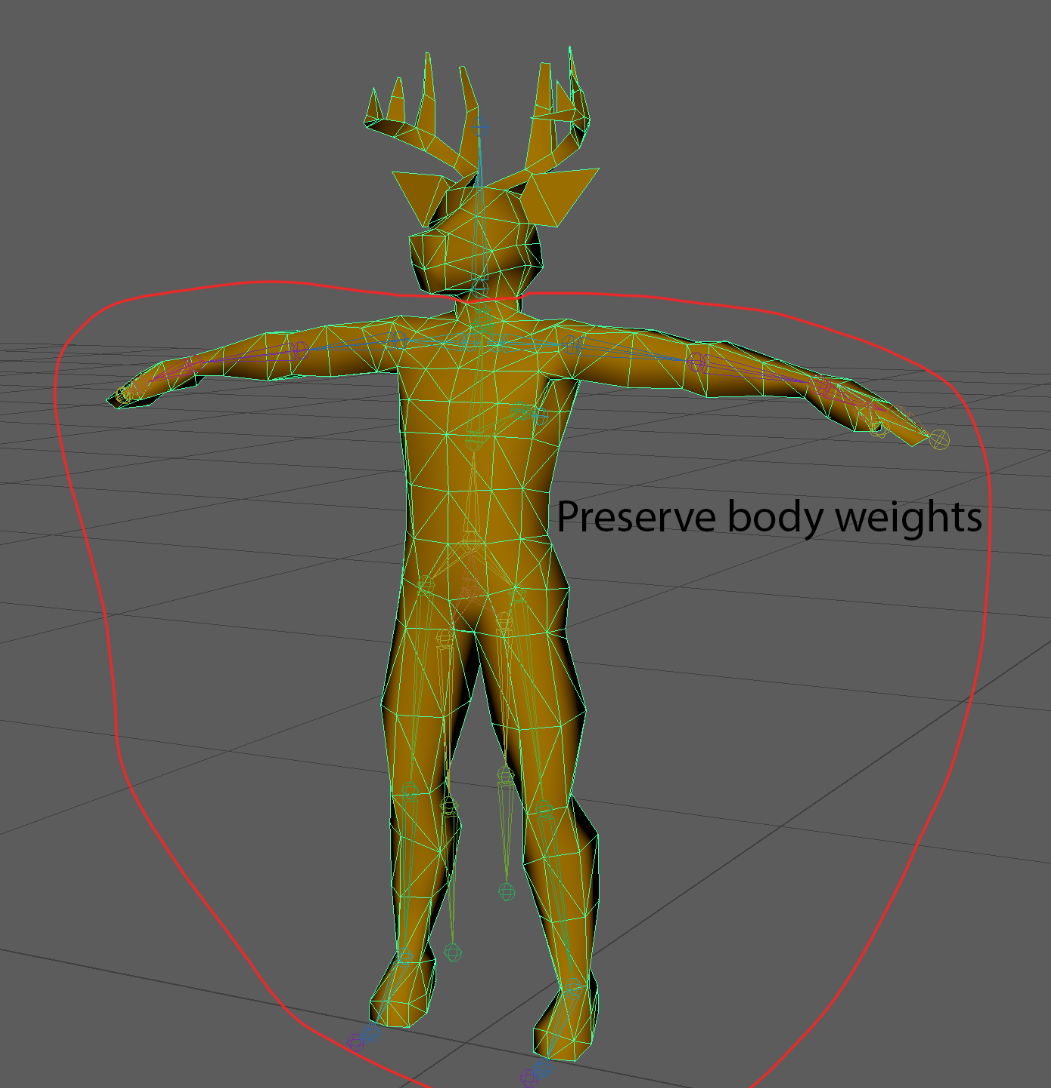
In order to prevent clothes from clipping with the character you need to keep the body mesh relatively unchanged (I did adjust the paws and legs a little, which is fine as long as the anthro character’s mesh is thinner than the base human mesh).
The vertex weights for the character skin must be identical to the base human mesh as well, or else animations will cause clipping on the clothing with the body.
UV layouts
When making your UV layouts you need to follow a few guidelines or you will find parts of your model becoming transparent when you wear certain clothes due to the masking system that Project Zomboid uses.
The highlighted UV shells are new mesh parts added to the male deer model, the other shells are untouched from the original human model so they will work with clothing/masking as normal. Do not move these original UVs or else very odd visual glitches may occur.
In the picture below red areas mean “do not put any UVs in this space,” as many of the Project Zomboid masks bleed out from the arms/legs and will clip into your new UVs and make parts of the mesh disappear.
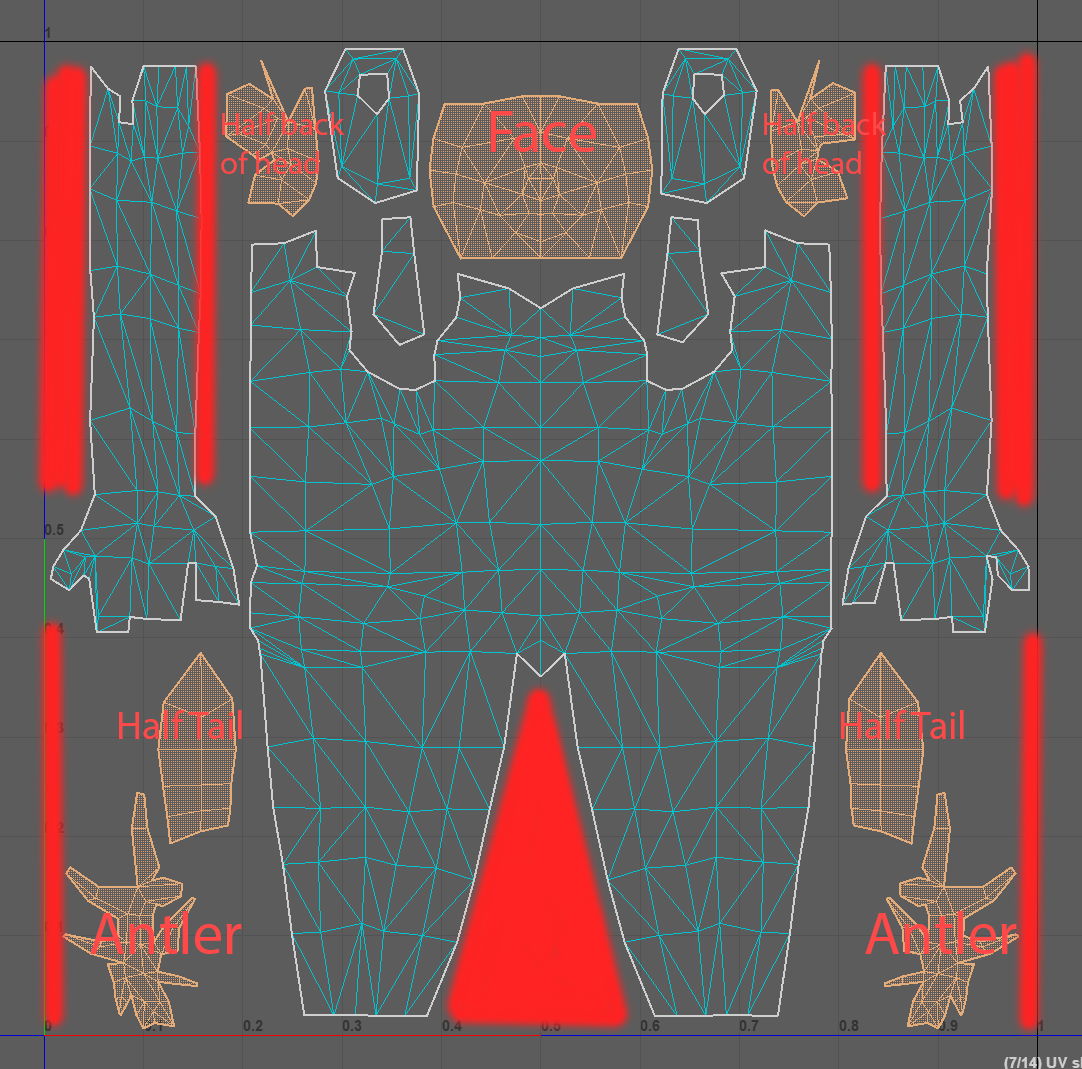
Keeping your UV layout symmetrical down the middle so you have half the tail on one side and half on the other is not necessary, but it makes painting with mirroring in Union Bytes Painter or similar programs much easier.
The character's skeleton should not be touched. These are the objects under the “Dummy01” object and all the joints within. Editing these joints will cause issues when animating the character in game.
The model can have any name, but it must be one combined mesh model, so make sure there are no extra meshes in your final export. The model must also have a single material, or parts of your texture will not appear.
When you are finished with your model and UV layout you will need to ensure the weight painting on the base body is preserved. You can copy these weights from any of our base species FBX files or the base human ones, but be sure to adjust the weights on the head/tail. For some species using the “Bip01_DressBack” and “Bip01_DressBack02” joints that hang down behind the character can be used to weight longer tails that hang if you want some motion on them in game.
Then when you’re all ready, export your mesh and joints in FBX format (“2013 or older” if you have such an option.) Then your next step is to paint up and use it with the mod tool.